Quick Start Guide
Welcome to GOAT Network, where you can empower a decentralized economy with sustainable yield, robust security, and a thriving ecosystem – dive into this user guide to get started!
Network Configuration
Connect your wallet to GOAT Network using these settings:
To integrate with GOAT Network, use an EVM-compatible wallet. Follow these steps:
- Add the network automatically: If supported by your wallet, click the provided button to automatically connect to GOAT Network. This process will configure the network parameters for you.
Connect to GOAT Network
- Manual configuration: For wallets that require manual setup, refer to the network details provided below. Open your wallet’s network settings and input the specified parameters to establish the connection. Use the following parameters to connect your wallet or development environment to the GOAT Network:
| Parameter | Value |
|---|---|
| Network Name | GOAT Network |
| RPC URL | https://rpc.goat.network |
| Chain ID | 2345 |
| Currency Symbol | BTC |
| Block Explorer | https://explorer.goat.network |
| Bridge | https://bridge.goat.network |
About Gas
Understanding Gas on GOAT Network
GOAT Network uses BTC as its native token for gas. This means you'll pay transaction fees in BTC. It uses an 18-decimal precision, unlike Bitcoin's 8-decimal precision.
Obtaining gas:
- You can obtain gas by bridging BTC from Bitcoin Layer 1 into GOAT Network using the GOAT Bridge (opens in a new tab).
- Airdrop of BTC gas from Faucet will be granted for bridging in more than $50 worth of either BTC (from Bitcoin Layer 1), BTCB (from BNB Chain), or DOGE via the official bridge, or for bridging in WETH, USDT, or USDC.e, via the Stargate bridge (opens in a new tab).
- Please note that BTCB cannot be used as gas within the GOAT Network – only BTC from Bitcoin Layer 1 can.
To optimize your transaction costs, review your wallet’s gas fee settings carefully. Using incorrect or unnecessarily high gas fees can lead to overpayment.
Saving GAS by using advanced gas mode
Please read the following instructions carefully to avoid overpaying for gas, it's crucial to check and adjust your wallet's gas settings before confirming transactions. Here's how to do it in MetaMask (the process may be slightly different for other wallets):
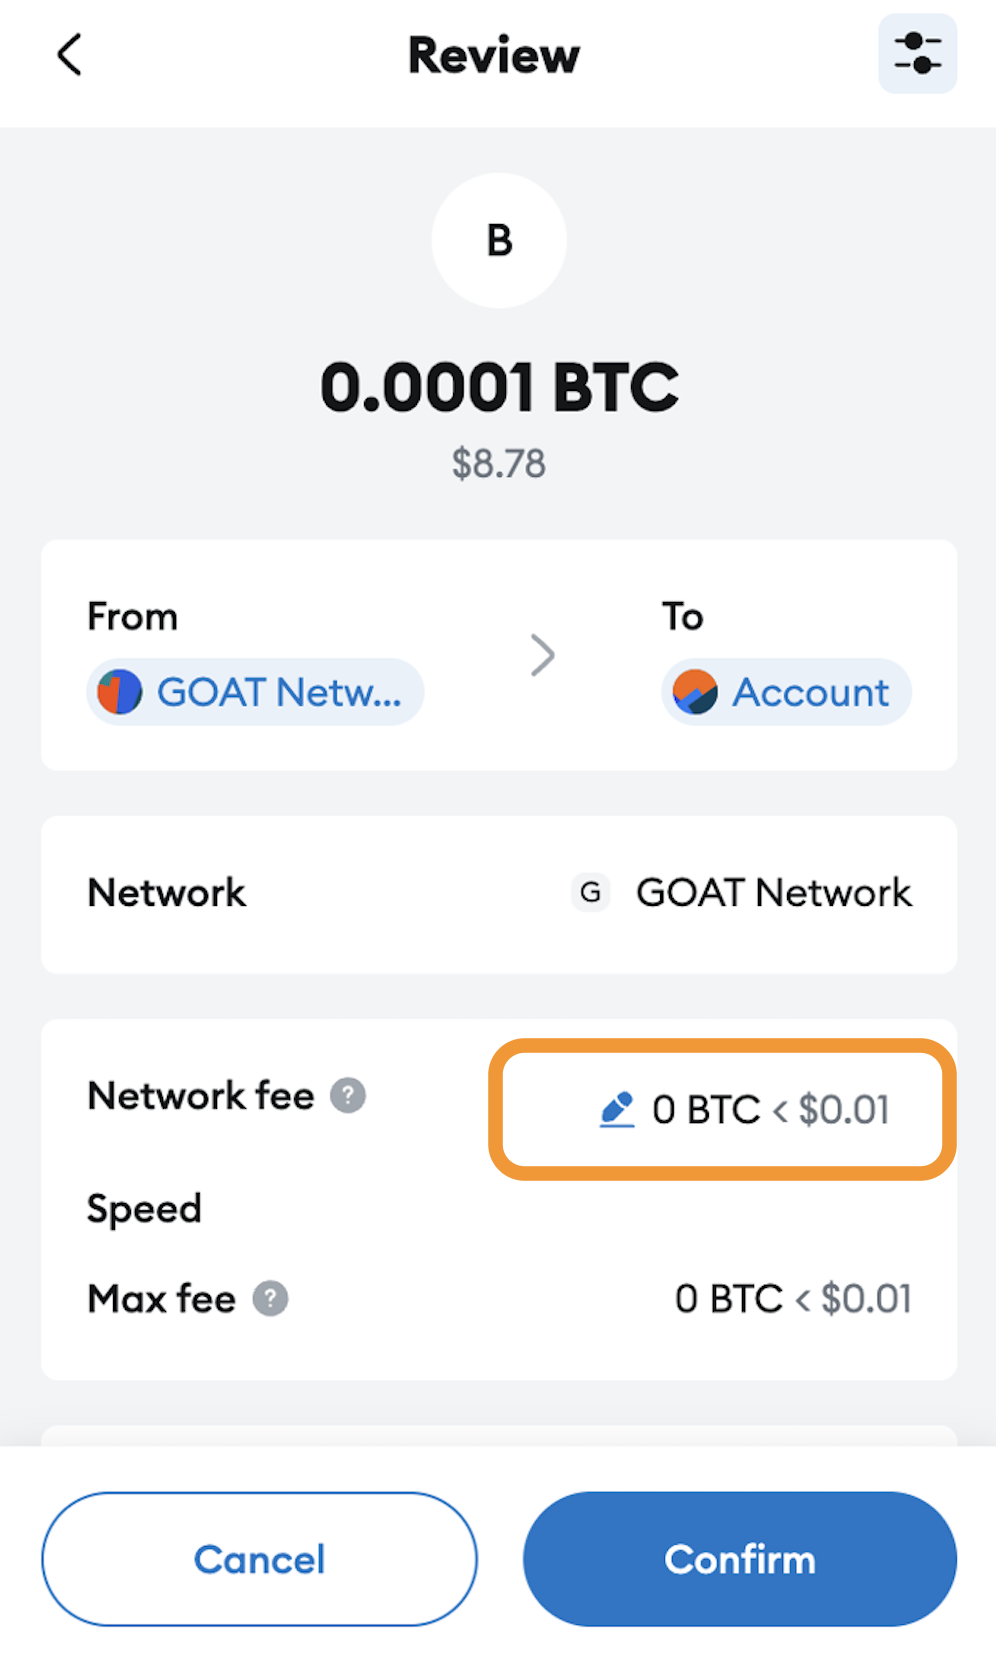
- Review gas fees
On the transaction confirmation page, locate the Network fee field and click the Edit button.
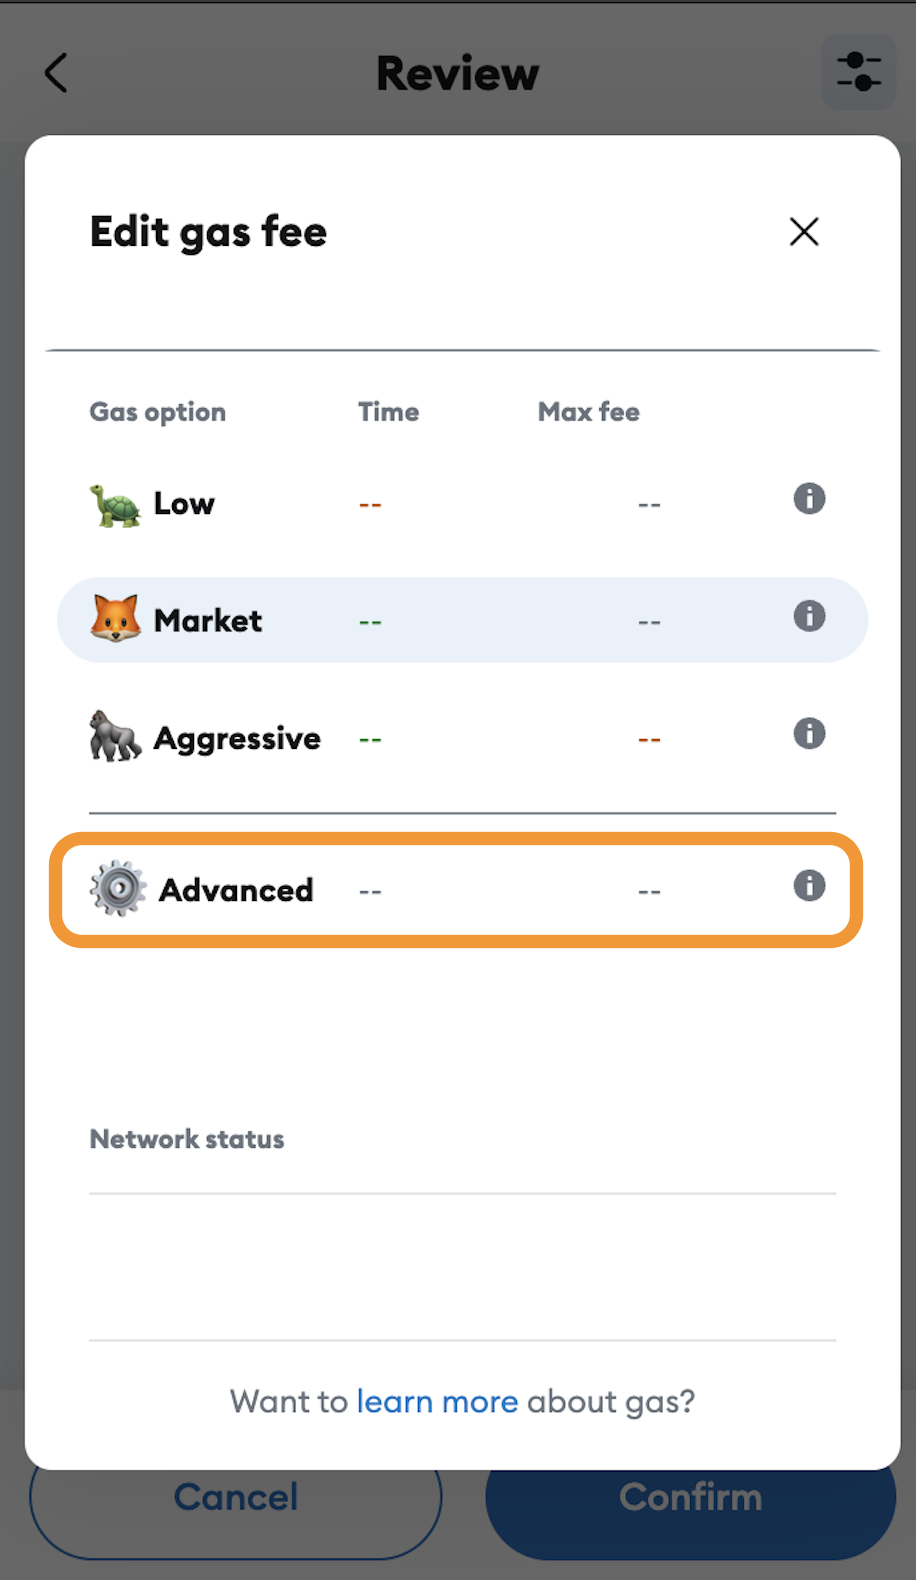
- Modify gas settings
In the Edit gas fee window, choose the Advanced tab.
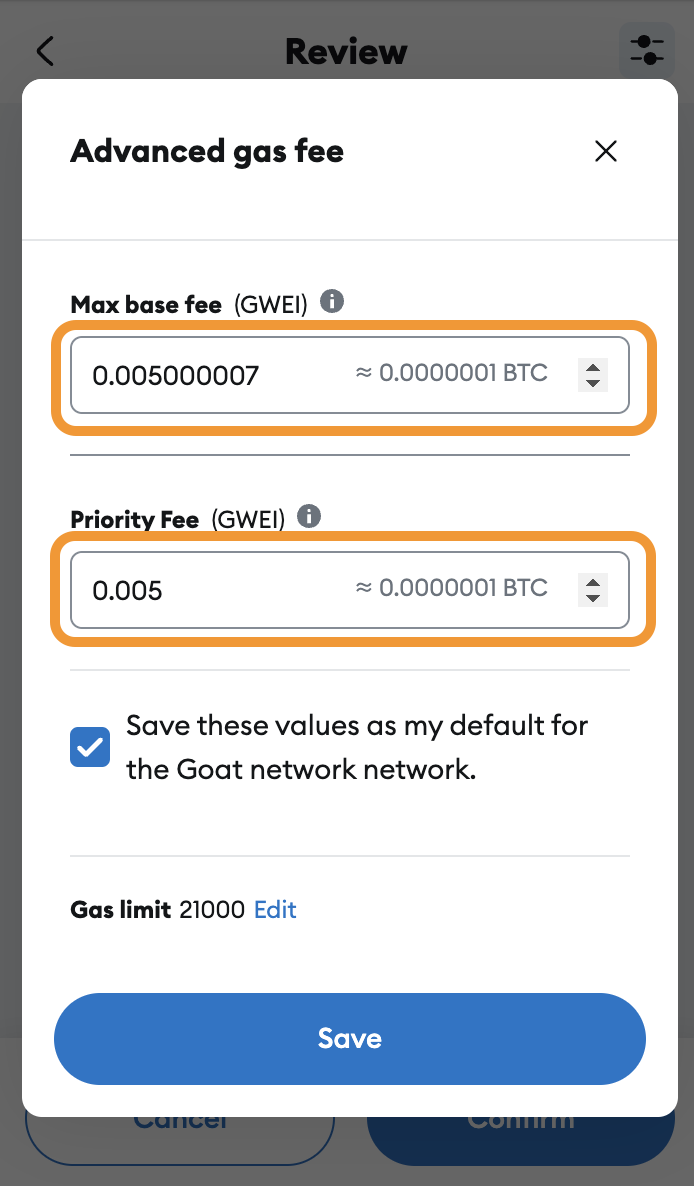
- Enter custom values
Max Base Fee (GWEI): 0.000130007
Base Fee (GWEI): 0.000000007
Priority Fee (GWEI): 0.00013
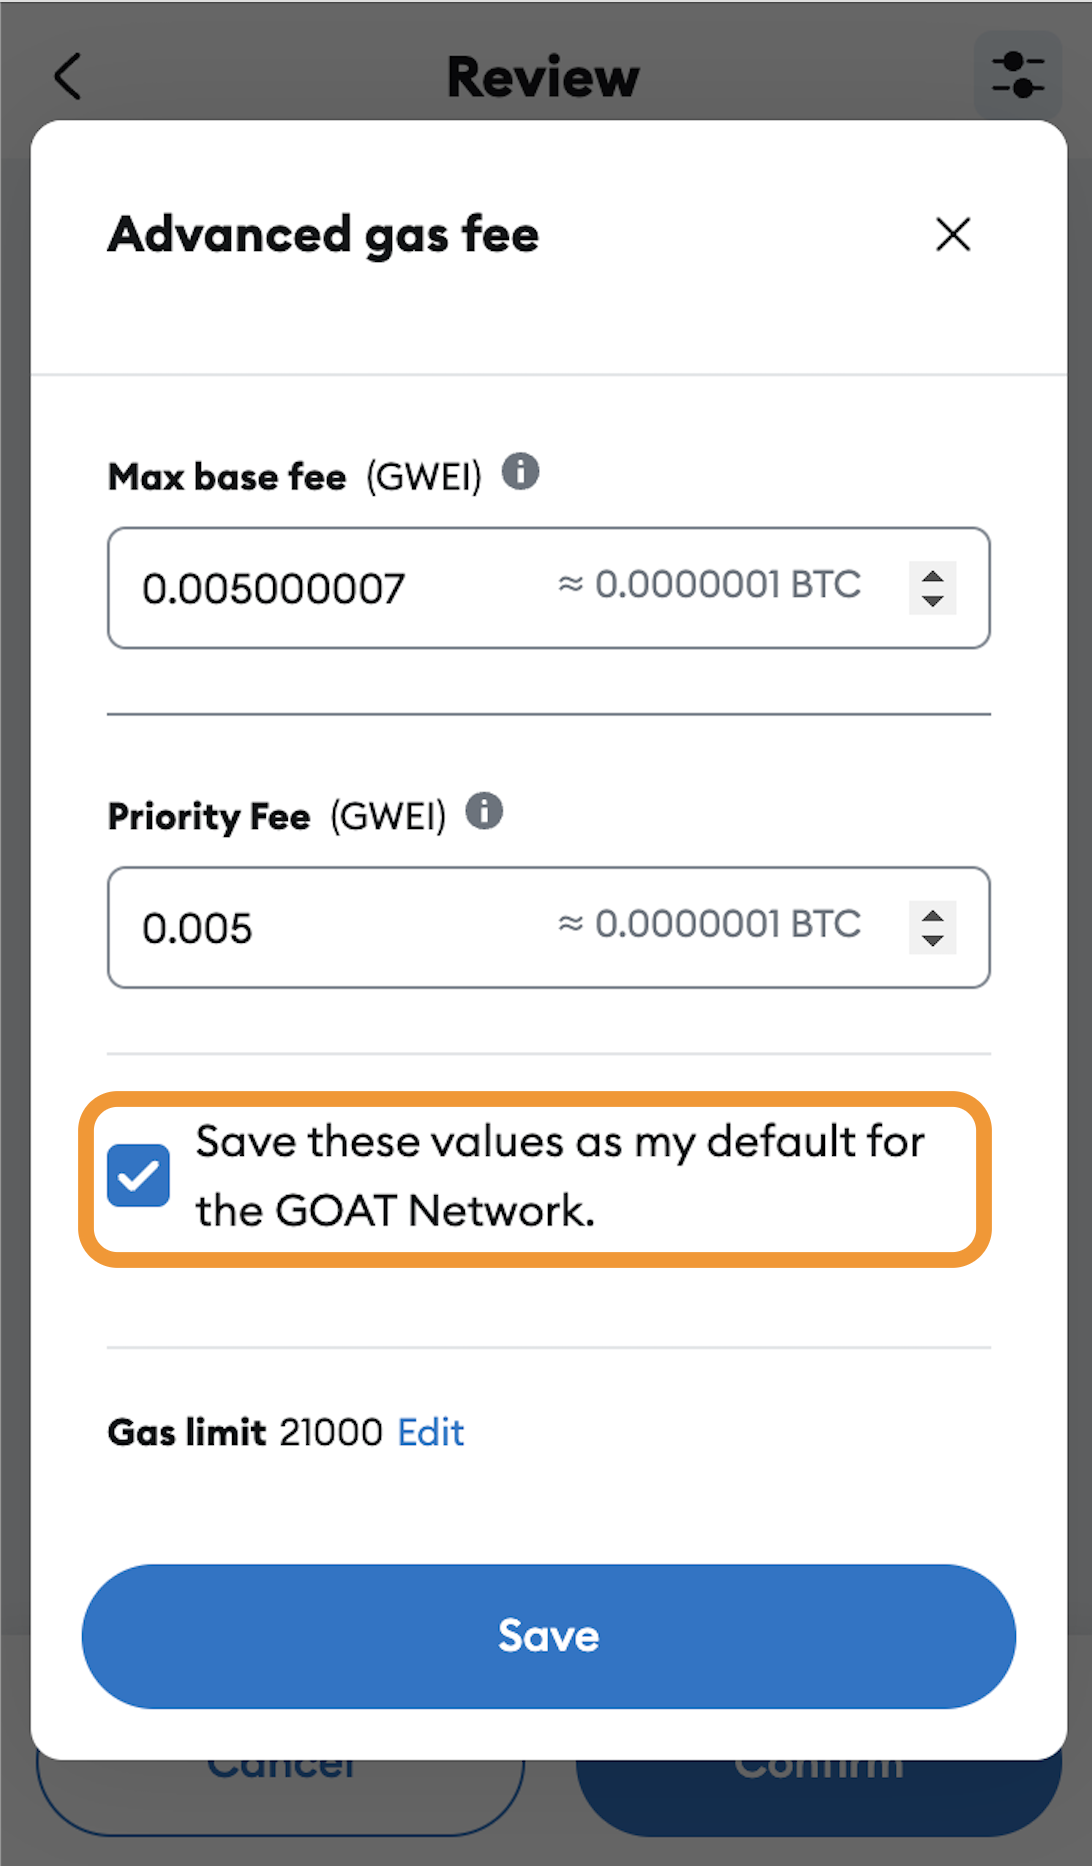
- Save defaults
Check Save these values as my default for GOAT Network so that your future transactions follow these optimized settings.
- Save
Click Save to apply the settings.
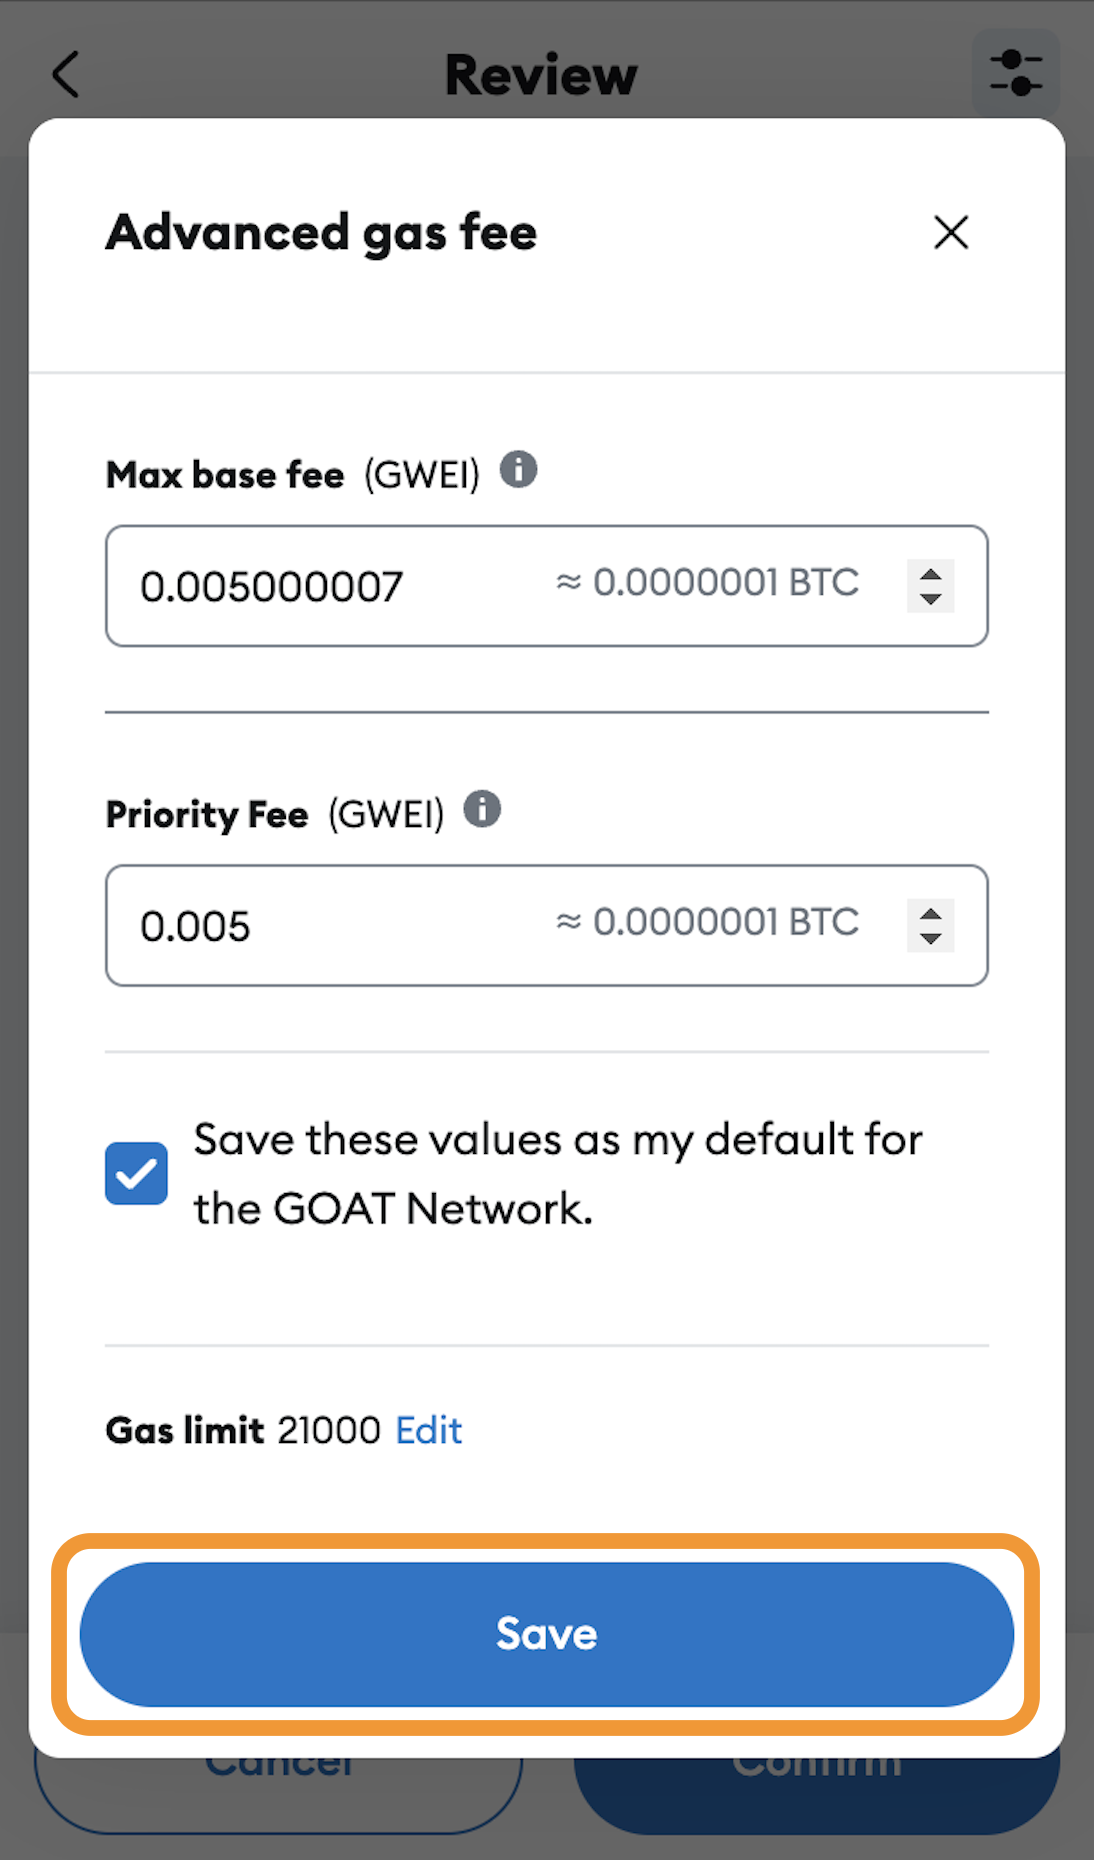
See MetaMask's Customize Gas Settings (opens in a new tab) Documentation for Details
Understanding Fee Calculation
GOAT Network uses EIP-1559 (opens in a new tab) for gas-efficient transactions, the formula for total transaction fees is as follows:
Total Fee = Gas Used × (Base Fee + Priority Fee)
Example Calculation (ERC-20 Transfer)
Let's say you're sending an ERC-20 token, and the transaction uses 21,000 gas units (a typical value for a simple transfer). Using the recommended Priority Fee of 0.00013 Gwei and the provided Max Base Fee of 0.000130007 Gwei.
Estimated Maximum Gas Costs = Gas Limit * (Max Base Fee + Priority Fee) = 21,000 * (0.000130007 + 0.00013) = 5.460147 Gwei = 0.000000005460147 BTC
In times of low network congestion, the actual base fee consumed may be as low as 0.000000007, you'll pay is as follows:
Typical Gas Costs = Gas Limit * (Base Fee + Priority Fee) = 21,000 * (0.000000007 + 0.00013) = 2.730147 Gwei = 0.000000002730147 BTC
Important Considerations
Network congestion: When the network is busy, gas prices may increase. Check your gas settings before confirming any transaction.
Further information
For more details, please refer to our docs, under Transaction Fees on GOAT Network.